
I like to call myself a lazy farmer. Life is busy as I’m sure it is for you as well. Eating nourishing, high quality food is important to me, and in theory I would love to be able to grow all the food my family needs to consume. Realistically, that’s not possible for us, and honestly, I don’t want to spend all my “free time” on growing plants. I tried that actually, and it burned me out. So over the years I have learned to listen to my body more, and focus on things that I love to grow, and a lot on the things that are easy to grow, even in the seasons that I forget to tend to the plants because let’s be real here, LIFE CAN GET BUSY!
With all that said, Garlic is the lazy plant, for this lazy farmer. It’s so easy to grow you will wonder why you haven’t been growing it all along. Also with that said, I ruined my garlic crop this year! Yes, the person telling you how to grow this super easy to grow plant destroyed her garlic crop. It’s a sore subject, and I breath out a big sigh every time I see one of the cute little bulbs anywhere still. This year was one of those LIFE CAN GET BUSY years like usual. I harvested a few bulbs of garlic early and they looked amazing. THEN. We got rain. And more rain. About a month and a half of what seemed like daily rain. There were a few days in between without rain but in those days I FORGOT ABOUT GARLIC.
Yes. I completely forgot. This is the downside when you make your garden too big, life takes over, and your to do list gets out of control when you have a few sunny days all summer. When I remembered to finally harvest the garlic, it was way passed it’s prime. Still edible and usable, but not as potent as it would be otherwise. The stems that normally scream garlic is here, were barely noticeable and most of the crop was taken back by the earth.
But, that’s okay. As that garlic, will automatically bring more more garlic next year!
The amazing thing is Garlic turns into a never ending crop once you get the hang of it and grow enough. Every year I (well at least I try) grow enough Garlic to last my family for the year, and enough extra to plant in the ground for the next season. It’s becomes a beautiful continuous cycle.
This year, most of the Garlic I grew will just be replanted to bring us next year’s crop. I will supplement the rest of our needs from locally grown Garlic from our local Farmer’s Market.
So you may be asking… how do you actually grow garlic?
First off, if you live in colder climates like I do in New England, you plant Garlic in the fall. This gives the plant more time to grow as it stays dormant in the winter and sprouts as soon as the temperature begins to warm up. You can plant it in early spring, but the bulbs won’t be as large. If you plant Garlic too early, or if you get a warm spell, the cloves can start to germinate… that’s okay. They will die off and start growing again in the spring. October is the typical planting time but they can be planted up until the ground is frozen. One year I didn’t have time to plant my garlic until December… in the dark… using a headlamp! That was an interesting looking row of garlic the following year 🙂
Also, there are two type of Garlic… soft neck and hard neck. Soft neck has a flexible stem and can be braided after harvesting to cure, but some find it harder to grow. Hard neck has a thicker hard stem that can’t be braided, but it produces a long edible flowering stem called a scape. I grow primarily hard neck Garlic where I live as I have more success with it and prefer having a scape to harvest.
How to grow Garlic:
Step 1. Purchase Garlic
Start off by obtaining what’s known as seed Garlic. It’s really important to not just use Garlic from the grocery store as it’s often treated so it won’t sprout making it last longer in stores and on your counter. If it won’t sprout, you will never get a crop. Conventional garlic can also contain viruses and fungi that can destroy your soil wherever you plant it, potentially for up to a decade or more! Seed Garlic is the term used to refer to Garlic that is intended on planting in the ground. Basically, it’s the biggest bulbs a farmer produces and they set it aside for growing purposes as the idea is the larger the clove you plant the bigger the bulb you get. I personally haven’t found much difference to what is produced when I plant large cloves verse small ones. You can order seed Garlic online or purchase organically grown Garlic from your local farmers market or area farms.
Step 2. Prep a bed for the Garlic.
Remove any leftover weeds and fluff up a bed of soil so it’s nice and loose. I like to add about an inch layer of good compost to the soil and mix it in in. Bed size is personal choice.
Step 3. Separate the cloves

Take the Garlic bulbs you purchased and remove the cloves. Each clove will be planted individually and turn into it’s own bulb! Some people like to soak their cloves first to get them to sprout, and some people remove the skin off the Garlic. I just separate the cloves and plant them as is and they grow just fine.
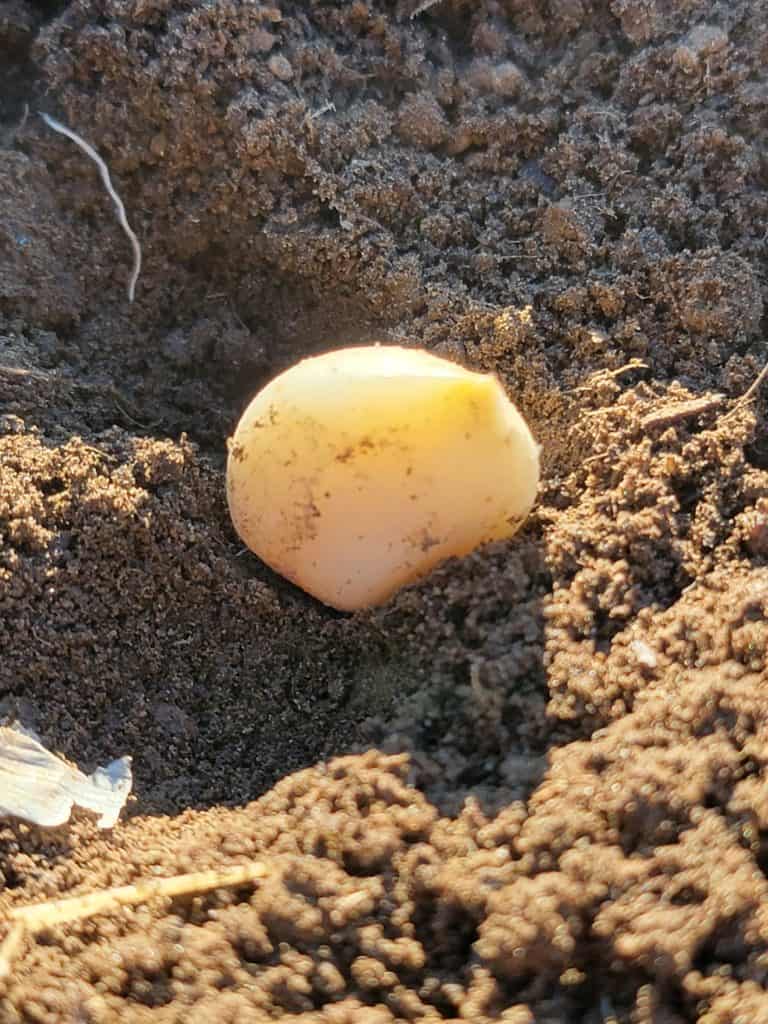
Step 4. Plant

Put each clove on top of the soil with the root part facing down and the pointy tip facing up (like the picture above). Space the cloves about the width of your thumb and pointer finger spread out, so about 3 inches in rows. Once in place where you want them use your fingers to push them down into the soil as far as you can and rub the soil above over the hole to close it up. The clove should be fully covered in soil.
Step 5. Dress the bed
The Garlic will stay snuggled in it’s new home all winter long and as the temperatures begin to warm in the spring it will begin germinating. Depending on how cold it gets where you live they can have a harder time handling the deep freeze. I like to apply a thick 1-2 inch layer of wood chips mulch or hay on top of the Garlic to protect the soil from the winter elements eroding it and keeping a little extra warmth in. This will also add more nutrients to the soil as it slowly breaks down and keep the weeds at bay.
Step 6. Harvest the scapes
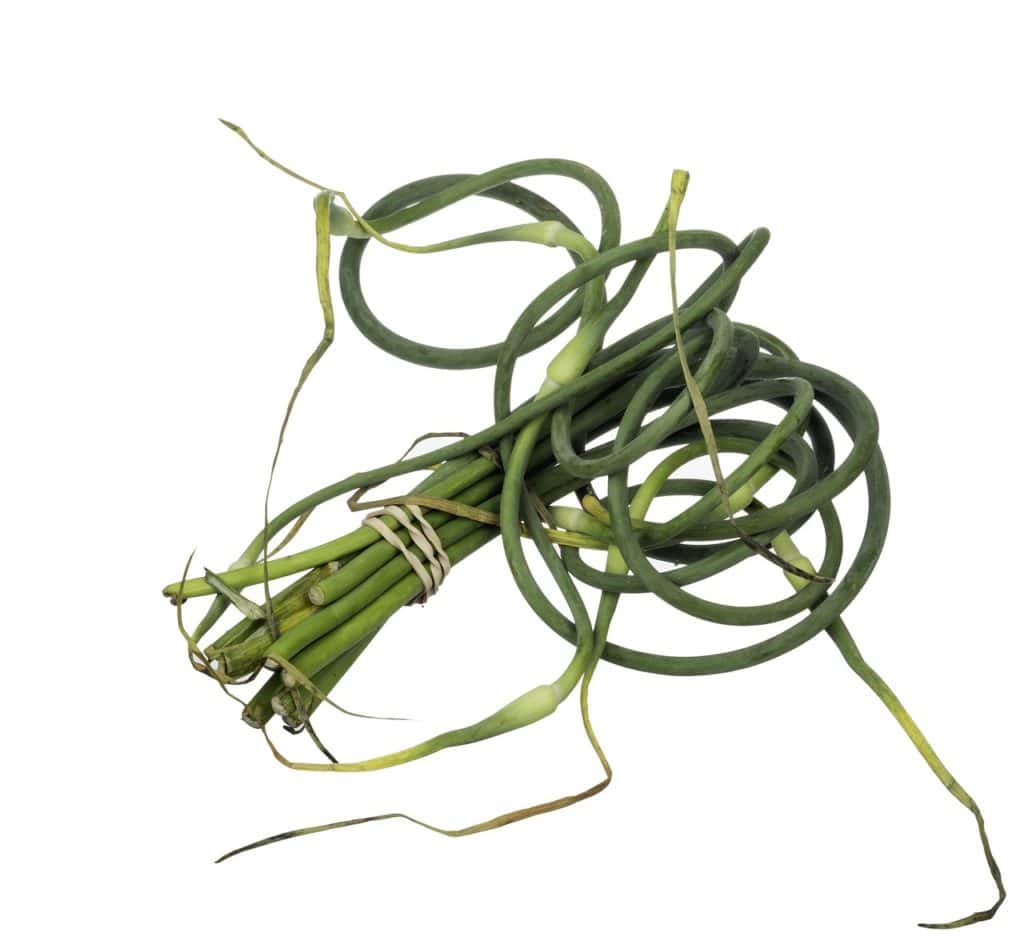
In the spring the Garlic will send up a shoot called a scape that has a flower pod at the end. The top of the scape can be cut off preventing the Garlic from going to seed and allowing more energy to go to the bulb, allowing the bulb to grow bigger. The scapes are great to use cut up when cooking as they have a mild Garlic flavor and are amazing in a scape pesto.
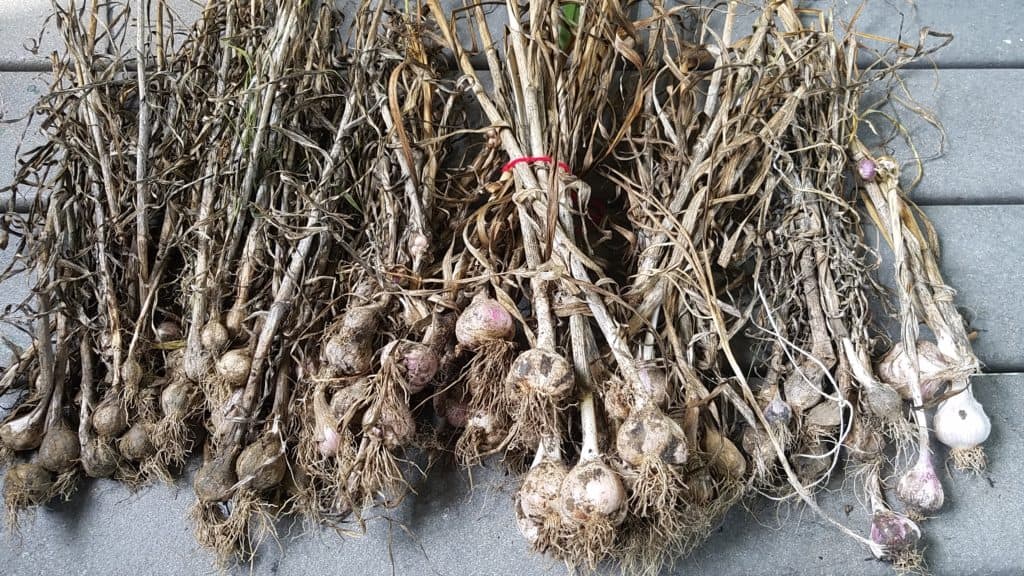
Step 7. Harvest the bulbs!
In mid to late summer the lower leaves will start to turn brown showing the energy has waned and the bulb is no longer getting bigger. This is when you want to pull up the stalk and admire you’re beautiful bulbs attached at the end. Sometimes the bulbs slide off the stems and separate and you have to dig around a little to find them. If you wait too long like I did this year, the Garlic won’t store as well as it won’t have as many of it’s protective layers.
After you have all your Garlic harvested cut off the stems leaving roughly 3 inches above the bulb. Then lay these down in a cool place with good ventilation out of direct sunlight and protected from the elements to cure for a few weeks until they’re dry and the skin is crisp to the touch. This allows them to be able to last longer so you can store them for several months. I like to lay mine out on my back deck. You then can store them away on the counter/in a container and use them as you desire.
Enjoy!
If you have any tips on growing Garlic I would love to hear from you! I hope you give Garlic a chance this season at growing and let me know how you’re experience goes.


